Yesterday we established our main prep area in the kitchen between the sink and stove top. We also located our knives nearby in a knife block or drawer. Let's talk about the knives a little more before we move on to other items in organizing our kitchen.
If we are using a drawer to hold our knives, we need to be smart about the knives and our safety. We don't just throw the knives in a drawer with other utensils and such. One could get injured reaching in to get something. There are drawer organizers that can be used for holding silverware or utensils. It might be a good idea to use such organizers. You can find these items at my favorite shopping sites, Kohl's, Food Network and QVC. If possible, it would be nice if the only items in the knife drawer were just the knives. Remember to put them in the drawer with the handles near you and the blades pointing away from you. You always need to be aware of your safety in the kitchen.
The next thing you want to plan in your kitchen is all of your counter space. You really want to keep the counters as uncluttered as possible. The only things on your counter should be items you use regularly and some minor decorations to help make it look appealing. Remember that space is usually an issue in most kitchens and some of you may have lots of counter space while others have absolutely minimal.
For those with little counter space, if you don't use an item several times a week, keep it off the counter. Items such as coffee makers, blenders and toasters take up space. However, if you are using them often they need a place on the counter. The same goes for canister sets that hold flour, sugar, coffee, tea bags, etc. This calls for you to use your common sense and prioritize the counter top.
The cupboard directly above your established prep area should hold your spices on the bottom shelf so they are handy. The rest of the cupboards above the counter should be set up with the items you use most. The bottom of the typical 3 shelf cupboard should have your most used items while the top shelf should hold the least used items. You also want to consider lighter weight items in higher locations rather than the heavy can type items. If you are height challenged, you might think about utilizing the cupboards below the counter to better serve you. It also helps to have a step stool or ladder handy for getting items in and out of those top cupboards.
Most the time the lower cupboards (under the counter) are used to hold pots, pans and other cooking dishes.
Please remember that few kitchens are the same and so you will have to adapt your needs and wants with the reality of your kitchen space. In doing so, try to make it as efficient as possible for your life style. I hope this has helped you in considering the function of your kitchen.
Tomorrow we have a recipe for the 4th of July weekend. It is "Bleu Bacon Burgers" and I hope you enjoy them.
Thursday, June 30, 2011
Wednesday, June 29, 2011
Get Organized in your Kitchen
There are people from one end of the spectrum to the other on being organized. I'm closer to the organized end then the other but there are many individuals out that could make me look disorganized. So if you can do it better, great. Maybe you could make some suggestions for the rest of us.
Not waiting around for a reply, I want to talk about taking stock of your kitchen. There are not many kitchens out there that are the same. They may have different amounts of square footage, layout, equipment and storage space. So everyone has to look at what they have and try to determine how is it going to work best for them. I mentioned in an earlier blog that I use a closet in the bedroom I converted to an office for my pantry. I really hate to say this but there are no perfect kitchens out there. Even the high-end ones that have been designed by pros find there are things they would do differently, after they operate in the kitchen for awhile.
So what are you, someone new at the game, going to do with your kitchen?
Well, let's start with reviewing what we have in our kitchen. Where is the stove, refrigerator and sink? These are some important pieces that you will be using as you navigate your cooking. What do you have for counter space? Where are the cupboards in relationship to the items already mentioned? Now that you have thought about these questions, let's start with a plan.
If you have ever watched a cooking show, you will have noticed that just about everyone has a kitchen island. You would have also noticed that they do most of their prep on the island next to a stove top of some kind (normally gas). That is what all of us would like to be able to do. So let's start with our stove top.
Now that we have the stove top, where is the sink in relationship to it? What is between that sink and stove top? Hopefully it is a good size piece of counter. This counter space between the sink and the stove top is a great place to set up your prep area. By doing this, you have the two pieces of equipment that you need most right where you want them.
The next item on our set up is where to put your knives. If you have a knife block to keep your knives in, then it should go on the counter in part of your prep area. If you don't have a knife block, then you will want to use a drawer right under your prep area. The reason behind this is you want your knives close. These will be the main tools you use as you prep a meal.
We have a prep area close to the sink, stove top and our knives. That is a good start and tomorrow we will continue with more organizing for the kitchen.
Tuesday, June 28, 2011
Up Dating the Cookbook
It's a big day today. I am sending the "final proof" back to the publisher. I found some errors, of which some were the printing process and some were the author's. With any luck I have found them all. However, I'm not going to hold my breath on being correct. Besides, it will give people something to look for as they use the cookbook.
I should be hearing from the marketing people soon. But with the 4th of July holiday coming up, I'm sure it will be after the 4th. This is going to be different now that the cookbook has been put to bed, so to speak.
The whole writing, editing, etc. is over. I now have to change my mind set and think about how we are going to promote the cookbook. Totally new area for me again. I have promoted eating locations, catering and all the things to bring customers in to eat in an establishment. I just haven't dealt with book buyers and sellers.
One of my younger brothers is a librarian but that is as close as I get to the subject. Of course I'm a buyer of books. Really more of cookbooks than just reading type books. I believe my cookbooks number in triple digits.
Well, I'm excited and nervous at the same time about this next phase in the cookbook process. Let's hope I have the ability to sell snow to Eskimos as we deal with the book buyers.
This week, we will talk a little about organizing your kitchen. Just some basics to get you started and maybe save you some time and effort. It is the 4th of July coming up and that makes for a great 3-day grilling weekend. So this week's recipe is for a good burger.
Friday, June 24, 2011
Grilled Portobello Mushrooms
Recipe:
Ingredients:
4 large Portobello Mushrooms (about 5 oz. each)
1/2 cup Extra Virgin Olive Oil (EVOO)
1/8 cup Italian Seasoning
1/8 cup Grated Parmesan Cheese
1/2 tsp. Salt
1/2 tsp. Black Pepper
As needed, Sliced Fresh Mozzarella Cheese
4 buns (your choice-I like using Ciabatta rolls)
Directions:
For each of the mushroom caps, wipe the top clean with a paper towel and remove the stem. Using a spoon, scrape the black gills out from the underside and discard. In a gallon size zip-lock baggie, combine the oil, Italian seasoning, Parmesan cheese, salt and pepper. Now add the mushroom caps to the bag, zip shut and blend with the seasoning mix. Marinade the mushrooms for 30 minutes before grilling. To grill, place each mushroom gill side down over medium-high heat and grill for 3 to 5 minutes depending on size. Turn the mushrooms over and continue to grill another 3 to 5 minutes. When you turn them over, add sliced fresh Mozzarella to the inside of the mushroom cap to melt. Be sure to watch over the mushrooms carefully as we don't want to burn them. Serve on your favorite bun or roll with lettuce, tomato and onion slices.
Note: You can use shredded Mozzarella cheese in place of the fresh.
Note: You can mix up the seasoning with fresh herbs of your liking. I will also
add garlic powder to the marinade on occasion.
Note: If you have trouble coating the mushrooms with the marinade, it can be
brushed on too.
___________________________________________________
___________________________________________________
___________________________________________________
___________________________________________________
___________________________________________________
Grilled Portobello Mushroom
(4 servings)
Ingredients:
4 large Portobello Mushrooms (about 5 oz. each)
1/2 cup Extra Virgin Olive Oil (EVOO)
1/8 cup Italian Seasoning
1/8 cup Grated Parmesan Cheese
1/2 tsp. Salt
1/2 tsp. Black Pepper
As needed, Sliced Fresh Mozzarella Cheese
4 buns (your choice-I like using Ciabatta rolls)
Directions:
For each of the mushroom caps, wipe the top clean with a paper towel and remove the stem. Using a spoon, scrape the black gills out from the underside and discard. In a gallon size zip-lock baggie, combine the oil, Italian seasoning, Parmesan cheese, salt and pepper. Now add the mushroom caps to the bag, zip shut and blend with the seasoning mix. Marinade the mushrooms for 30 minutes before grilling. To grill, place each mushroom gill side down over medium-high heat and grill for 3 to 5 minutes depending on size. Turn the mushrooms over and continue to grill another 3 to 5 minutes. When you turn them over, add sliced fresh Mozzarella to the inside of the mushroom cap to melt. Be sure to watch over the mushrooms carefully as we don't want to burn them. Serve on your favorite bun or roll with lettuce, tomato and onion slices.
Note: You can use shredded Mozzarella cheese in place of the fresh.
Note: You can mix up the seasoning with fresh herbs of your liking. I will also
add garlic powder to the marinade on occasion.
Note: If you have trouble coating the mushrooms with the marinade, it can be
brushed on too.
Ideas for Future Efforts
___________________________________________________
___________________________________________________
___________________________________________________
___________________________________________________
___________________________________________________
Thursday, June 23, 2011
Grill Accessories
Everyone could get by with just a basic grill and two grill tools (tong & spatula/turner). But who just wants to get by with basics? Grilling is a lot more fun with the extras.
There are extras that help give you more flexibility to your grilling. One of the most common would be skewers for grilling kebabs of some fashion. You can use metal or wooden skewers for making these meat, vegetable or meat & vegetable kebabs. If using wooden skewers (usually bamboo) it helps greatly to soak them in water for a short time. This helps keep them from starting on fire turning the grilling process. One of my favorite kebabs is made with kielbasa, fresh pineapple, green pepper and onion.
Because the grills have grates and small pieces of food can fall through easily, they have come up with all types of grill baskets and grill plates. The grill baskets can range from solid metal with holes to wire screens. Some will have lids or tops so you can flip them during the grilling process. They can come in the shape of wok pans, whole fish, rectangles, squares and circles. You need to look at them and figure out which one best meets your needs. Some of you may need several. As usual, my shopping sites are Kohl's, Food Network and QVC) and they have a wide variety of these and many more accessories for your grill.
You can even get pizza grilling pans and beer can chicken holders. It just depends on how diverse you want to get in your outdoor cooking. They have cedar planks too. The fun thing to do is find something a little different that you really like and become an expert at it. That way you create a grilling reputation that makes family and friends want to be at your cookouts.
In outfitting your grilling area, you should remember to have a grill thermometer and grill cleaning tools on hand. The thermometer lets you know your grill temperature for cooking. Remember that some foods require different temps for different reasons. The cleaning tools will help you keep your grill ready for cooking and help it last many years. That is one of the ways you justify the expense of that grill you want with all the bells and whistles on it.
There are two other items some of you may need for your grill. For those of you with a charcoal grill, a charcoal chimney starter is a big help. It gets your fire going faster and helps make it more consistent. Others may want to have a wood chip smoker. This piece of equipment helps give your grilling more flavor. They are simple to use and depending on the wood chips you use, can make a big difference in taste.
The last thing I'll mention today is a grill light. During the summer with daylight savings it may not be needed. But anytime you are cooking in low sunlight, it really helps to have a light right at the grill. Sometimes it is hard to see if some foods are getting done because the patio light just doesn't do the job. You might be surprised at how easy they are to use.
Tomorrow's blog is a recipe for "Grilled Portobello Mushrooms" and we just had them last weekend. They were mighty good.
There are extras that help give you more flexibility to your grilling. One of the most common would be skewers for grilling kebabs of some fashion. You can use metal or wooden skewers for making these meat, vegetable or meat & vegetable kebabs. If using wooden skewers (usually bamboo) it helps greatly to soak them in water for a short time. This helps keep them from starting on fire turning the grilling process. One of my favorite kebabs is made with kielbasa, fresh pineapple, green pepper and onion.
 |
| Wire Grill Basket |
Because the grills have grates and small pieces of food can fall through easily, they have come up with all types of grill baskets and grill plates. The grill baskets can range from solid metal with holes to wire screens. Some will have lids or tops so you can flip them during the grilling process. They can come in the shape of wok pans, whole fish, rectangles, squares and circles. You need to look at them and figure out which one best meets your needs. Some of you may need several. As usual, my shopping sites are Kohl's, Food Network and QVC) and they have a wide variety of these and many more accessories for your grill.
 |
| Covered Grill Basket |
You can even get pizza grilling pans and beer can chicken holders. It just depends on how diverse you want to get in your outdoor cooking. They have cedar planks too. The fun thing to do is find something a little different that you really like and become an expert at it. That way you create a grilling reputation that makes family and friends want to be at your cookouts.
In outfitting your grilling area, you should remember to have a grill thermometer and grill cleaning tools on hand. The thermometer lets you know your grill temperature for cooking. Remember that some foods require different temps for different reasons. The cleaning tools will help you keep your grill ready for cooking and help it last many years. That is one of the ways you justify the expense of that grill you want with all the bells and whistles on it.
 |
| Metal Grill Basket |
There are two other items some of you may need for your grill. For those of you with a charcoal grill, a charcoal chimney starter is a big help. It gets your fire going faster and helps make it more consistent. Others may want to have a wood chip smoker. This piece of equipment helps give your grilling more flavor. They are simple to use and depending on the wood chips you use, can make a big difference in taste.
 |
| Portable LED Grill Lights |
The last thing I'll mention today is a grill light. During the summer with daylight savings it may not be needed. But anytime you are cooking in low sunlight, it really helps to have a light right at the grill. Sometimes it is hard to see if some foods are getting done because the patio light just doesn't do the job. You might be surprised at how easy they are to use.
Tomorrow's blog is a recipe for "Grilled Portobello Mushrooms" and we just had them last weekend. They were mighty good.
Wednesday, June 22, 2011
More Grilling and Accessories
I thought that since we are in the "Grilling Season" and the 4th of July weekend is coming soon, I should touch on the subject with a little more information.
Depending on where you live, the "Grilling Season" could be short and so you want to take as much advantage of it as possible. I have a recipe for "Grilled Portobello Mushroom" in Friday's blog. Even if you are a meat eater, you will want to try this dish.
There are recipes galore out on the internet for summer grilling. Check them out and add a few dishes, other than hot dogs and hamburgers, to your grilling repertoire this year. Think out of the box a little for your summer menus and invite some friends or family to enjoy them with you.
In a previous blog I talked about grilling equipment but it was basically about just grills. Well the grill is just the start to items you need or want for your grilling pleasure. I did mention grilling tools (but no fork near the grill) and you can buy tool sets everywhere. My favorite locations of Kohl's, Food Network and QVC have a great selection of these for you. Grill covers are another item you may want to help protect and extend the life of your grill. They have these too.
Tomorrow I will continue with many more accessories that you can use with your grill.
Tuesday, June 21, 2011
Another Update on the Cookbook
My wife and I recently went on a trip to Seattle. We were fortunate to have non-stop flights. I personally like to read westerns and took a book by Louis L'Amour. He and Zane Grey are/were probably the two best writers of western stories. Both are deceased but their stories continue. At least that is my opinion.
While reading the book, I came across an error. In one paragraph, the main hero and villain were referred to with the same first name. The first name was really that of the villain. There was a mistake in a Louis L'Amour book. I was shocked and relieved all at the same time.
I have been going through my final proof of the cookbook and worrying that I might miss something, a mistake. I've been losing hair or it is turning grayer, at least in my mind, over this thought of a mistake in the cookbook.
I'm doing my best to make sure there are no mistakes in the cookbook. I owe that to those who will buy the cookbook, my publisher and myself. However, after this discovery in the Louis L'Amour book I now know the world will not end. At least not until the Mayan end of the world prediction for next year. Especially since we all missed the one last month by the guy in California.
With this knowledge, my hair has started to grow back and even darken a little. As I stated before, I'm doing my best to get it right. But if I screw up and miss something, at least I'll be in good company with Louis L'Amour and his publisher.
My goal is to have the editing of the final proof done by this weekend. Wish me luck.
Friday, June 17, 2011
Chicken Wild Rice Soup
Recipe:
Chicken Wild Rice Soup
(1 to 1 ½ gallons depending on how much you thin it)
Ingredients:
1 cup Carrots, small dice
1 cup Celery, small dice
1 cup Yellow Onion, small dice
1 4 oz. can Mushrooms, stems & pieces, chopped
3 qt. Chicken Broth, divided
1 lb. bag Wild and Brown Rice
1 lb. Cooked Chicken Breast, small dice
1 tbsp. Chicken Base
1 tsp. Salt
½ tsp. Black Pepper
¼ tsp. Cayenne Pepper
1 cup Heavy Cream
Directions:
Crockpot/Slow Cooker:
In a 6 to 8 qt. slow cooker, put everything but the heavy cream. Stir to mix well, top with lid and turn on low for 6 to 8 hours. Add the heavy cream 10 minutes before serving stirring to mix. This is a thick soup, so thin it if you need with chicken broth or water. Taste and adjust seasoning as needed. Serve with some good bread.
Stovetop:
Place the carrots, celery, onion and mushrooms in a large pot (6 to 8 qt.) and add 2 qt. of the chicken broth. Heat this mixture on medium until it comes to a boil and then continue for 30 minutes. Now add the rice to the pot and return to a boil. Once at a boil, lower temperature to simmer, cover with a lid and continue for another 30 minutes. Remove lid and add the remaining chicken broth, chicken, chicken base, salt and both peppers. Stir mixture and continue to simmer for 30 minutes remembering to stir occasionally. Just before serving, add the heavy cream, mix and heat another 10 minutes. This is a thick soup, so thin it if you need with chicken broth or water. Taste and adjust seasoning as needed.
Note: You can easily cut the recipe in half to make a smaller batch. If you do, a 4 qt. pot or pan will serve you well.
Note: Feel free to add more cayenne pepper or some hot sauce if your tastes require a little more heat.
Note: You can change out or add different vegetables to meet your personal
palate.
Note: I will add a little sherry (1/2 to 1 cup) to the soup occasionally. It just gives a nice taste enhancement. Be sure to add with the first chicken broth.
Ideas for the Future
__________________________________________________
__________________________________________________
__________________________________________________
__________________________________________________
__________________________________________________
Thursday, June 16, 2011
Slow Cooker/Crockpot
Today we are going to talk about Slow Cookers and what to look for in one that you might want in your kitchen.
The basic ones have four settings; Off, Low, Hi and Warm. You place it on the one you want and it cooks at that temperature until you change it. The advanced ones are programmable and some even have probes. These you can set the length of time at hi or low and then have it go to a warm holding cycle. They are great for cooking one pot meals, soups and stews, large pieces of protein (beef, pork, lamb, chicken) and side dishes.
Older Slow Cookers and some on the bottom of the price range do not have removable crocks. They still work well but are harder to clean up when you are done. The crock is made of stoneware and is fairly non-stick. The newer ones have a stoneware crock that is removable and thus easier to clean as you can submerge it in water. That is something you can't do with the non-removable ones.
Slow Cookers mostly come in both round and oval shapes. The main price range for them runs from around $30 to $80. There are those that cost into 3 figures too. The typical size runs from 4 to 6 quart. Again, you can find them smaller and larger. You can find a good variety of them at Kohl's and QVC for example.
I would recommend having a 6 quart oval Slow Cooker that is programmable. The Slow Cooker that I have also has the probe. It is a nice option but I really don't use mine that often. This type is going to be in the $50 to$80 range.
I have had several over the years. The ones in the lower price range have a tendency to have hot spots while cooking. It will be along part of one side usually. I have not noticed that in the ones from the higher end of the price range.
If you haven't ever tried one, please ask a friend who has one what they think of a Slow Cooker. I think you will find it really does help your lifestyle and saves you time.
Tomorrow is a recipe for "Chicken Wild Rice Soup" and it can be done in a Slow Cooker or on the stove top. I hope you enjoy the soup.
The basic ones have four settings; Off, Low, Hi and Warm. You place it on the one you want and it cooks at that temperature until you change it. The advanced ones are programmable and some even have probes. These you can set the length of time at hi or low and then have it go to a warm holding cycle. They are great for cooking one pot meals, soups and stews, large pieces of protein (beef, pork, lamb, chicken) and side dishes.
Older Slow Cookers and some on the bottom of the price range do not have removable crocks. They still work well but are harder to clean up when you are done. The crock is made of stoneware and is fairly non-stick. The newer ones have a stoneware crock that is removable and thus easier to clean as you can submerge it in water. That is something you can't do with the non-removable ones.
Slow Cookers mostly come in both round and oval shapes. The main price range for them runs from around $30 to $80. There are those that cost into 3 figures too. The typical size runs from 4 to 6 quart. Again, you can find them smaller and larger. You can find a good variety of them at Kohl's and QVC for example.
 |
| Slow Cooker |
I have had several over the years. The ones in the lower price range have a tendency to have hot spots while cooking. It will be along part of one side usually. I have not noticed that in the ones from the higher end of the price range.
 |
| Slow Cooker Apart |
Tomorrow is a recipe for "Chicken Wild Rice Soup" and it can be done in a Slow Cooker or on the stove top. I hope you enjoy the soup.
Wednesday, June 15, 2011
Slow Cookers help with Lifestyle
I don't know to many people with a lot of extra time in their hectic lives. Everyone is always looking for ways to save time or become more efficient with their time. The same goes in the world of cooking.
Our life schedules don't always give us the time we need or would like to make dinner. Rachael Ray's show on the Food Network called "30 Minute Meals" basically came about because of our hurried schedules. We are all looking to put food on the table with less time required.
Well, one of those ways is with a Slow Cooker or Crock Pot. They go by both names but we will use Slow Cooker throughout the blog.
What is a Slow Cooker? It is a piece of cooking equipment that can sit on your counter and essentially just needs to be plugged in to work. They started out as Crock Pots because that is what they were, a pot shaped crock that had a heating element round the crock. The heating element didn't create high heat. Instead it used low heat and long time for the cooking process.
A Slow Cooker has a "Low" and "Hi" heat setting with which to cook. Items cooked on the "Low" setting usually cook for 8 to 10 hours. The "Hi" setting is usually used for 4 to 6 hour times.
The appeal of the Slow Cooker is that you can get up in the morning and just throw the ingredients into the cooker, turn it on and dinner is ready when you come home. Now some dishes may require a little more than that but it takes minimal time to put together and then basically just serve it when it is time for dinner.
The great thing about a Slow Cooker is it does save you time and helps make life a little easier. Every household should have one. They really are a handy piece of cooking equipment. Tomorrow we will talk more about the actual Slow Cooker and what to look for in one.
Tuesday, June 14, 2011
Update on Cookbook
I have the "Final Proof" in hand and have been going through it page by page. I have also had several others doing the same. We have found a few "gremlins" but overall it looks great. Now I'm sure that I am a little biased in my opinion. So I have showed it to several people (both with and without a connection to me) and have received very good reviews.
It was really quite exciting to open the package and see the look of the finished cookbook (in rough form). When I started this process back in 2009, I really didn't have a picture in my mind of how the cookbook would turn out.
It has been a fun and enlightening adventure thus far and we're just getting to the exciting part. I will begin working with the marketing department soon. Then there is the cookbook release and (hopefully) lots of book signing events.
We are still on course for a September release. When we get there, I will have a link on my blog to be able to buy the cookbook. I have taken a picture of the front and back of the "Final Proof" and attached them below.
 |
| Front % Side of Cookbook |
 |
| Back Cover of Cookbook |
Friday, June 10, 2011
White Chicken Lasagna
White Chicken Lasagna
(8-12 servings)
Ingredients:
12 tbsp. Butter (1 ½ sticks)
½ cup All-Purpose Flour
2 cup Milk
1 ½ cup Heavy Cream
1 cup Chicken Broth
½ tsp. Ground Rosemary
½ tsp. Ground Tarragon
½ tsp. Garlic Powder
1/8 tsp. Nutmeg
1 cup Chopped Parsley
1 ½ cup Grated Parmesan Cheese
12 Traditional Lasagna Noodles, cooked al dente
2 lb. Cooked Chicken Breast, sliced thin
1/8 cup Grated Parmesan Cheese (Optional)
Directions:
Melt butter in a large sauce pan over medium heat and then whisk in the flour. Cook the butter/flour mixture for 2 to 3 minutes and then start adding the milk, cream and chicken broth. Be sure to whisk continuously as you add these ingredients. Heat the mixture to a boil while whisking to keep the sauce from scorching on the bottom of sauce pan. The mixture will start to thicken some as it comes to a boil. When this happens, add the rosemary, tarragon, garlic, nutmeg and parsley to the mixture and incorporate. Remove the sauce pan from the heat and whisk in the 1 ½ cups of Parmesan cheese.
To assemble the lasagna, place a ½ cup of sauce in the bottom of a 9x13 pan. Place 3 pieces of lasagna noodles in the pan lengthwise and cover with 1 cup of the sauce. Completely cover the noodles and sauce with a layer of sliced chicken. Repeat the noodle, sauce and chicken layers 2 more times. Then finish with the 4th layer of noodles, remaining sauce. Sprinkle the sauce with the 1/8 cup of Parmesan cheese (if using) and bake uncovered in a 350 degree oven for 25 to 35 minutes. Let rest 10 minutes before cutting into serving pieces.
Note: For the chicken in this recipe, you could use sliced chicken breast from your favorite deli or grocery store. I use the “Baked Chicken Breast” recipe from the cookbook coming in September. You could also use sliced turkey in this recipe.
Note: You can also use the non-cook lasagna noodles for this recipe. Because they are thinner then the regular ones, the lasagna will not be as tall in the pan.
Note: Be sure and place a sheet/cookie pan on the rack under the rack with the lasagna on it to catch any overflows. Sometimes a casserole dish will overflow and make a mess in the oven. The pan helps by catching the overflow and keeping the oven clean.
Ideas for Future Efforts
___________________________________________________
___________________________________________________
___________________________________________________
___________________________________________________
___________________________________________________
Thursday, June 9, 2011
Dishes to use for Casseroles
 |
| Oval 2 qt. Casserole |
 |
| 8x8 Glass Casserole |
 |
| 9x13 Ceramic Casserole |
The most famous is a 9x13 casserole dish. The various shapes mentioned above include the following sizes; 1 qt., 1 1/2 qt., 2 qt., 8x8, 10x15 in addition to the famous 9x13 pan.. These are not the only sizes but are the most common. There are also individual casserole cookware. You see these used in many restaurants.
 |
| Famous 9x13 Metal Casserole |
All this variety, and then some, in casserole cookware can be found at my favorite Kohl's store. Go check them out and see if they have what works for you and your kitchen.
Tomorrow is my recipe for "White Chicken Lasagna" and it has become my wife's favorite lasagna. Try it with a little salad and the garlic bread recipe from the blog on May 27th.
Wednesday, June 8, 2011
Why make Casseroles
I really don't know the origin of people first making casserole dishes for meals. However, I imagine that casseroles appeared shortly after ovens and the ability to bake items. It doesn't matter who invented them or when they first became popular. The thing to know about casseroles is that they are still popular.
The term "Casserole" has a duel meaning. It refers to a particular type of food/recipe that is baked. An example would be "Baked Mac & Cheese", "Ham & Potatoes" or "Shepherd's Pie."
But the term refers to the type of dish you're using too. We will look at that tomorrow.
If you have ever been to a "Pot Luck" dinner, then you have seen casseroles at their best. This type of dinner event gives you entrée and side dish casseroles of a wide variety. If you have gone to a couple of these dinners, you have probably seen some casserole dishes that you have never even thought of trying.
They are really just another form of comfort food. They are usually made from less expensive food items but can get costly. Casseroles are normally easy to throw together, but not always. I would say they can feed a few people and the person can take a large portion or just a little. Another nice aspect of casseroles is their ability to be great as leftovers. Many of the casserole recipes will freeze well too.
Remember that many casserole recipes can be made the day before and refrigerated until time to bake. I would pull them about 30 minutes before you need to put them in the oven. It helps them to bake more evenly (inside and out). Find some good casserole recipes and take advantage of them. One of my favorites is in the blog on Friday.
Tuesday, June 7, 2011
The Cookbook Update
Received word from my "Layout Editor" that the final proof is in the mail to me. I should have it in hand any day now. This is exciting but it makes me nervous too. I have to go through the cookbook, cover to cover, and find any mistakes that remain.
I have talked to other authors about this process. They all told me how gremlins get in there and screw something up. Looks like fun times are a head for me.
Since I'm so close to the project, I will seek a couple of other people to help edit the final proof.
I have 30 days to get it all done and returned to the publisher. Then we start the marketing piece to get the cookbook out there. Wish me luck.
This week we are going to talk a little about casseroles. We will cover both the recipes called casseroles and the cookware that are named casseroles. It is interesting how we refer to Lasagna as a casserole dish (food) and it is made in a casserole dish (cookware)
Speaking of Lasagna, the recipe this week is for "White Chicken Lasagna." It is made with white chicken and a white sauce. It is an excellent dish in my opinion and goes well with the garlic bread from two weeks ago. Please let me know how it works for you.
Friday, June 3, 2011
Homemade Pizza
Recipe:
(makes 2 small or 1 large pizza)
Ingredients:
1 Cup – Warm Water
1 Pkg. – Yeast
2 ½ to 3 Cups – White Flour
2 Tbsp. – Olive Oil (EVOO)
½ Tsp. – Salt
Directions:
Combine warm water and yeast in a large mixing bowl. Let set for 5 minutes and then add the olive oil and salt to the yeast mixture. Start adding the flour to the mixture a half cup at a time and mix well. At some point, you will need to remove the dough from the mixing bowl and continue on the counter top. Be sure to put a little flour on the counter before placing the dough on it. Let the dough rest for about 30 minutes before making into the pizza shell. Using a little corn flour, roll out pizza dough to about a ¼ inch thickness and place on a pizza stone or a sheet pan.
Top with your favorite sauce and toppings. Use the amounts that fit your style. Bake the pizza at 450 degrees in a pre-heated oven for about 15 minutes or until crust has browned nicely and cheese has melted. For a slightly crisper crust, pre-heat the pizza stone as you heat the oven.
Note: If you are using ground beef or sausage, it is best to precook it. The pizza will get very greasy if you use raw meat.
Note: Red sauces are normal but you are only limited by your imagination. Try Alfredo, BBQ, Ranch, Pesto or a Vodka sauce for a change.
Note: Even garlic infused olive oil and parmesan cheese make a good base for a pizza. I top this one with chopped fresh Basil, sliced Roma tomatoes and sliced fresh Mozzarella. Come up with your own specialty pizza.
Ideas for the Future
Thursday, June 2, 2011
Pizza Tools/Needs
To make homemade pizza dough you really only need a counter top, large mixing bowl and the ingredients. But to turn it into a finished pizza ready to eat, you'll need a few more things.
Once you have made the pizza dough and it is ready to be made into a pizza, you will need a rolling pin of some kind. I have a small rolling pin (see picture) from "Pampered Chef" that my daughter gave me. It works well for me. If I need a longer one, I will use what I have on hand. Sometimes that is a 2-liter bottle of soda. You just need something that is smooth and round to roll out dough to the size and shape you need. Because of years of experience, I will toss my pizza dough with my hands to get the thin crust.
Another item that would be nice is a docker. It rolls over the dough and pierces little holes in the dough. This helps keep the dough from having air pockets that bubble up during the cooking/baking process. A docker is round with a handle and nail like spikes sticking out. I don't have one at home but we used them a lot when I was working. At home, I just use a fork and prick the dough all over with the prongs.
The next tool you may want is a pizza peel. This is a flat like board (also in metal) used to slide under the dough and place it onto a hot pizza stone or oven rack. It can retrieve the pizza from the stone or rack too. You may even cut your pizza on the peel. I don't use one at home but I do use a pizza stone to bake on.
My pizza stone is well cured from use but I use it for more than just pizza. When I make pizza, I put my stone in the oven so it heats up in the oven. I'll remove it, place my dough on it, add my toppings and put it back in the oven to bake. This helps give it that crisp crust. You can just put your dough on it cold and bake, but you may have to adjust the time and the crust won't be as crisp. It is all personal preference.
You can make your pizzas rectangular or round and use sided pans. Some like to do this and keep their pizza dough thicker. Kind of on the order of Chicago style pizza. Try it all ways for a little spice in your life.
Once the pizza is done, you'll need a pizza cutter and maybe a pie server. The pizza can be cut with just a knife but I prefer using a pizza wheel cutter. It's fast and easy for the pizzas on a stone or peel. The ones in a pan would be better off if you removed them and then cut.
Some people like to add a little Parmesan cheese and/or red pepper flakes to their slice. So you might want to have a shaker of each available.
All these items can be found at my favorite store, Kohl's. Pizza dough recipe tomorrow.
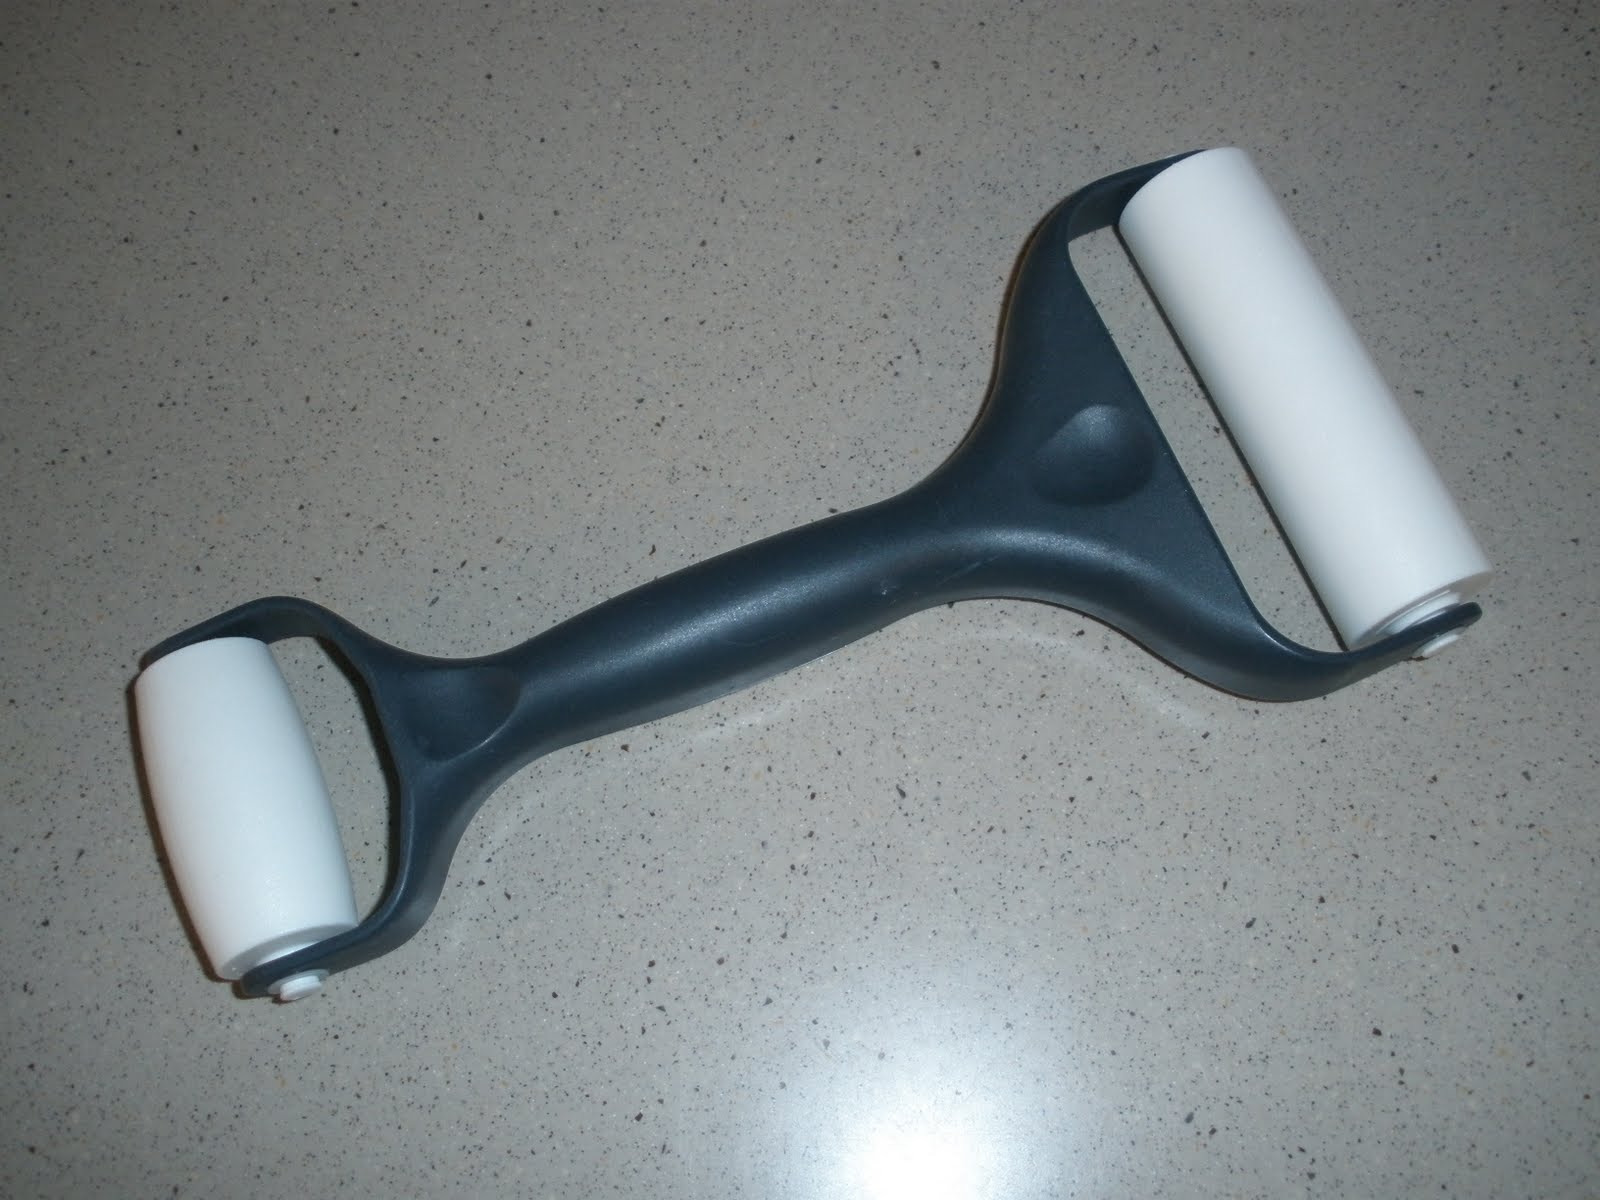 |
| Dough Roller |
Another item that would be nice is a docker. It rolls over the dough and pierces little holes in the dough. This helps keep the dough from having air pockets that bubble up during the cooking/baking process. A docker is round with a handle and nail like spikes sticking out. I don't have one at home but we used them a lot when I was working. At home, I just use a fork and prick the dough all over with the prongs.
The next tool you may want is a pizza peel. This is a flat like board (also in metal) used to slide under the dough and place it onto a hot pizza stone or oven rack. It can retrieve the pizza from the stone or rack too. You may even cut your pizza on the peel. I don't use one at home but I do use a pizza stone to bake on.
 |
| Pizza Baking Stone |
You can make your pizzas rectangular or round and use sided pans. Some like to do this and keep their pizza dough thicker. Kind of on the order of Chicago style pizza. Try it all ways for a little spice in your life.
 |
| Pizza Cutter & Server |
Some people like to add a little Parmesan cheese and/or red pepper flakes to their slice. So you might want to have a shaker of each available.
All these items can be found at my favorite store, Kohl's. Pizza dough recipe tomorrow.
Wednesday, June 1, 2011
Kitchen Ovens
We have talked about counter top toaster/ovens and the broiler part of a regular oven in past blogs. Today I want to touch on the biggest piece of equipment in most kitchens, the oven. Most kitchens have a standard stove. It will use gas or electricity for the heat source. The standard stove has burners on top and an oven underneath. There will be a broiler under the oven, if it is gas. The broiler for an electric stove is in the oven. A standard oven comes with 2 racks (adjustable) to be used in it.
For those kitchens that don't have a standard stove, you usually find counter top burners (gas or electric) and a built-in wall oven. They operate the same as the ones in the standard stove and are typically electric.
Your typical oven will have a heat range of around 170 to 550 degrees (Fahrenheit). I mention Fahrenheit because we have people from outside the United States reading this blog.
The great thing about this temperature range is what it allows you to do in an oven. That low temp of around 170 lets you keep food warm as you finish up batch cooking. The high temperatures let you put a nice crust on meats to help hold in the juices. Most recipes for the oven will call for temperatures that run from 300 to 450 degrees. The most typical temps used are 350, 375, 400 and 450.
I mentioned above the adjustable racks used in an oven. The reason they are adjustable is that some recipes will call for where to place that dish in the oven. There are recipes that want you to keep a dish in the lower half of the oven and others that want it in the upper half. If a recipe doesn't state an oven location, it is best put in the middle.
Many of the ovens these days are of the self-cleaning type but not all. So if you want to help keep your oven clean, it is sometimes a good idea to put a sheet pan on the rack under the dish in the oven. This will catch juices of one kind or another from dripping on to the floor of the oven. It can make a mess that is not much fun to clean up. Of course there are times when you forget or don't have time to clean up a mess. Then you use the oven again and wonder why there is smoke and smell in the kitchen that is not wanted.
I was a boy scout along with each of my 6 brothers and the motto "Be Prepared" just always makes sense. Why create a mess if you can avoid it?
This is all I'm going to mention on ovens unless someone has a question or two. If you do, just write a comment. Tomorrow and Friday I will be talking about what you need to make and bake pizzas along with a recipe for easy homemade pizza dough.
Subscribe to:
Posts (Atom)